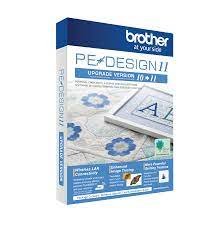
How to Install Brother PE-Design 11: A Comprehensive Guide
Brother PE-Design 11 is a powerful embroidery software that offers extensive features for creating and editing embroidery designs. This guide will walk you through the step-by-step process of installing Brother PE-Design 11 on your computer.
Step 1: Prepare Your System
Before you begin the installation, ensure your computer meets the following minimum requirements:
- Operating System: Windows 7, 8, 8.1, or 10 (32-bit or 64-bit).
- Processor: Intel Core i3 or higher.
- RAM: 4GB or more (8GB recommended).
- Hard Disk Space: At least 600MB of free space.
- Display Resolution: 1024×768 or higher.
- USB Port: For connecting the USB security device (dongle).
Step 2: Download the Software
- Visit the Official Website: Navigate to the official Brother website or your authorized distributor’s website.
- Locate the Software: Find Brother PE-Design 11 in the download section.
- Download: Click the download link to start downloading the installer. Ensure you download the version appropriate for your operating system (32-bit or 64-bit).
Step 3: Install the Software
- Locate the Installer: After the download is complete, find the installer file in your downloads folder (usually named something like
PEDesign_11_Setup.exe). - Run the Installer: Double-click the installer file to begin the installation process. You may be prompted by User Account Control (UAC) to allow the installer to make changes to your system. Click “Yes” to proceed.
- Follow Installation Steps:
- Accept the License Agreement: Read and agree to the terms and conditions.
- Choose Installation Folder: Select the default installation directory or specify a different location.
- Select Components: Choose the components to install. The default options are recommended for most users.
- Begin Installation: Click “Install” to start the installation. This may take several minutes depending on your system’s speed.
Step 4: Connect the USB Security Device
- Insert the USB Dongle: After the software installation is complete, insert the USB security device (dongle) into a USB port on your computer. The software requires this dongle to run.
- Install Dongle Drivers: The system should automatically detect and install the necessary drivers for the dongle. If not, follow any on-screen prompts to complete the driver installation.
Step 5: Launch and Activate the Software
- Launch Brother PE-Design 11: After installing the software and connecting the dongle, launch the software using the desktop shortcut or from the start menu.
- Activation Prompt: You may be prompted to activate the software upon first launch.
- Enter Activation Key: Input the activation key provided with your purchase. If you don’t have an activation key, contact Brother support or your software provider.
- Complete Activation: Follow the on-screen instructions to complete the activation. Ensure you have an internet connection for the verification process.
Step 6: Configure the Software
- Initial Setup: Upon first launch, you may be guided through an initial setup wizard. This will help configure basic settings such as language, units of measurement, and default file locations.
- Add Your Embroidery Machine: Go to the “Machines” menu and select “Add Machine.”
- Select Machine Model: Choose your embroidery machine model from the list of supported machines.
- Install Machine Drivers: Follow the prompts to install necessary drivers for your machine.
- Configure Machine Settings: Adjust machine settings according to your needs, including hoop size, thread colors, and stitch settings.
Step 7: Import and Manage Design Files
- Import Files: Use the “Import” function to load your design files into Brother PE-Design 11. Supported formats include .PES, .DST, .PHC, and more.
- Manage Designs: Organize your designs in the software’s library. Use the design management tools to categorize and tag your files for easy access.
Step 8: Start Creating and Embroidering
- Create New Designs: Use the design tools to create new embroidery patterns. Take advantage of the software’s advanced features such as stitch effects, lettering, and auto-digitizing.
- Edit Existing Designs: Modify existing designs by adjusting stitch properties, colors, and elements.
- Send to Machine: Once your design is ready, send it to your embroidery machine. Ensure your machine is connected and properly set up.
- Monitor the Embroidery Process: Keep an eye on the embroidery process to ensure it runs smoothly and make any necessary adjustments.
Troubleshooting Tips
- Installation Issues: If you encounter problems during installation, ensure your system meets the minimum requirements and try reinstalling the software.
- Activation Problems: Verify your activation key and ensure a stable internet connection during the activation process.
- Machine Configuration: Make sure you have the latest drivers for your embroidery machine model installed.
Conclusion
Installing Brother PE-Design 11 is straightforward if you follow these steps carefully. This powerful embroidery software enhances your creative capabilities with its advanced features and intuitive interface. If you encounter any issues, refer to the user manual or contact Brother support for assistance. Happy embroidering!
I hope this guide is helpful. If you need any modifications or additional information, please let me know!


